

Feasting
Best Homemade Beef Jerky
Aug
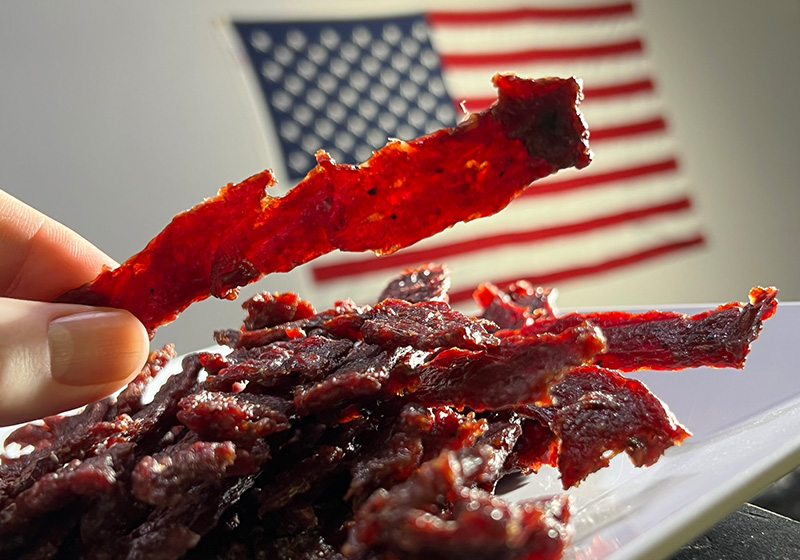
In the snack universe, beef jerky stands alone. Jerky is savory, it’s low in fat but high in protein, and you can take it anywhere. And it’s so easy to customize the flavors that you can dial it in just the way you like it. With a handful of ingredients, anyone can make this money-saving snack.
The Gear
I’m always looking for ways to make things better, and faster. A few years ago, I found two jerky products I really like. Welcome to the world of the Nesco Snackmaster Pro Dehydrator and Jerky Maker and the Jumbo Jerky Kit.
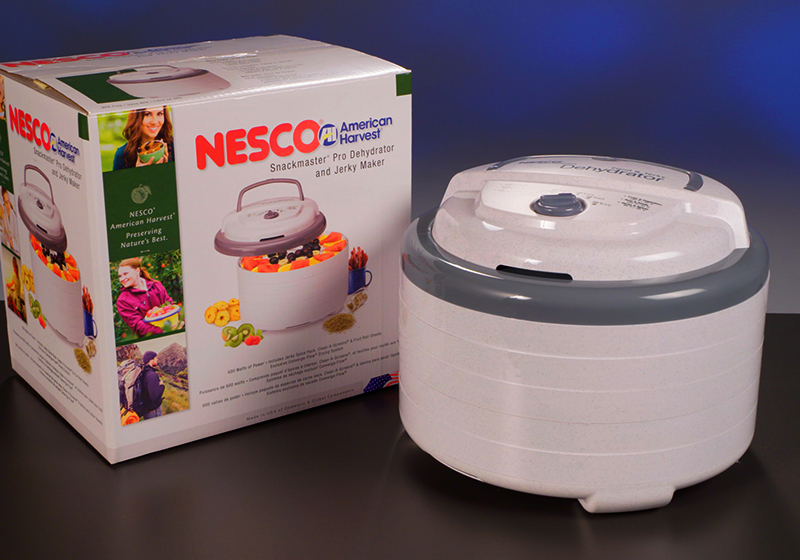
Nesco engineered some creative airflow into their Snackmaster system. It essentially has a base module with five stackable trays with a fan on top—and it’s simple to operate. If you’re really serious about higher capacity food production, you can buy additional trays and use up to 12 of them at once. True to its name, the Snackmaster Pro makes way more than just jerky. It’s a great tool for drying fruits, vegetables, and herbs too. Anyone with a garden should have a dehydrator like this for sure.
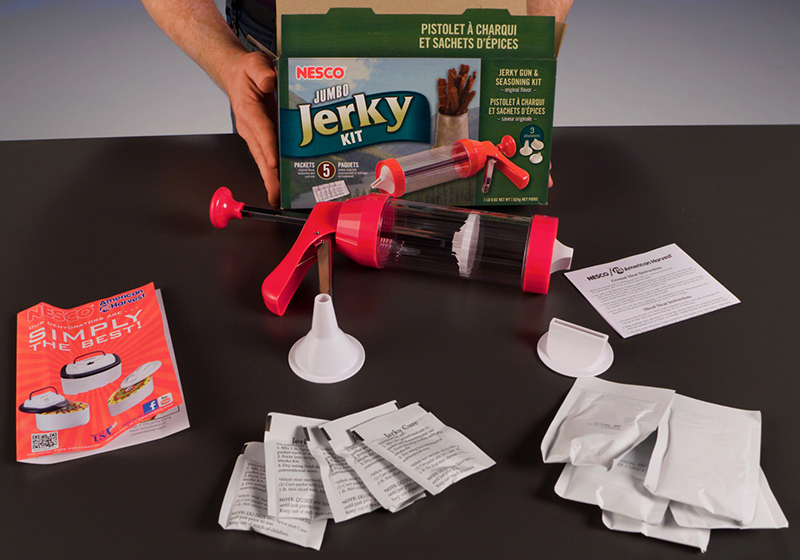
I picked up the Jumbo Jerky Kit because I’m a gadget guy. But at this point, it’s definitely an essential part of my process. It dispenses uniform portions of jerky mixture in your choice of three different shapes. The meat is thick enough so everything sticks together, but thin enough so that the jerky dries thoroughly and is nicely preserved.
Both kits include packets of jerky flavor and jerky cure. The Nesco seasoning is pretty tasty. It’s a savory combination of spices including onion, garlic and salt. I recommend making at least one batch without adding anything to this base so that you know what you’re working with. Then you can start tweaking it. I like mine with a little more heat, and a little more sweet. So I usually add 1/2 tsp. of fine red pepper and 2 tbsp. of brown sugar.
What You Need
- 2lbs. ground beef (96% fat free)—check the sell-by date to make sure it’s really fresh!
- 2 packets Nesco jerky flavor
- 2 packets Nesco jerky cure
- ½ tsp. finely ground red pepper (optional)
- 2 tbsp. brown sugar (optional)
- Cup or small bowl
- Large bowl
- Fork
- Small sharp knife
- Paper towels
Prepare the Protein
Every batch starts with the flavor mix and jerky cure. Each Nesco packet is measured out for a pound of meat. Since I have two pounds of ground beef, I’m using two packets of the jerky seasoning and two packets of jerky cure.
- Alternate pouring the jerky flavor and jerky cure into the cup or small bowl.
- Add optional red pepper and brown sugar, or your own custom flavorings.
- Thoroughly mix the dry ingredients with the fork.
You want a fine powder that will distribute evenly throughout the meat. If you don’t get all the lumps out, you’ll end up with chunks of dried spice in your jerky, and that’s always disappointing.
- Put the ground beef in the large bowl and pour the spice mix on top.
- Blend the dry ingredients completely into the meat with your hands.
- Lock and load the jerky gun.
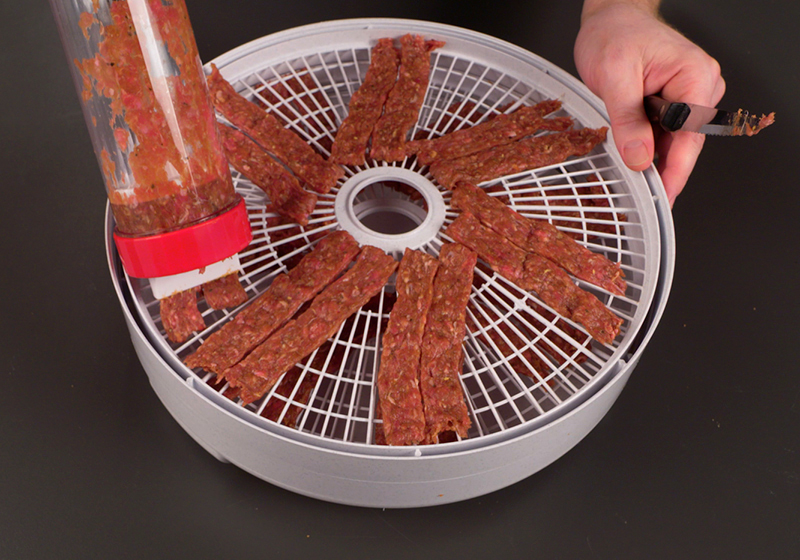
The jerky gun works just like your caulking gun. Press the silver button on the top and pull the plunger back so you can load the mixture in. Pack the tube with small spoonfuls of meat. Try to avoid air pockets, although they won’t mess things up too much. Cap it off with your chosen tip and screw on the collar. The tip that I like best makes two thin ribbons of ground beef at the same time.
Dispense and dehydrate
Dispensing the raw jerky mixture onto the trays is as easy as pressing the lever. Use the knife to cut the pieces off and make sure that the raised edges of the trays stay clean so the unit stacks up properly. In my experience, the five trays that come with the dehydrator fit two pounds of ground beef almost perfectly.
Let’s get this Snackmaster running! Put the base down first, followed by the trays, and then the lid (aka, “The Brain”) on top. Turn the dial to the 160° jerky setting. That’s why they started calling this model “Pro Dehydrator.” Because 160° is the temperature that Nesco recommends to make the food nice and safe to eat. There is no power switch so the last step is to plug it in.
The manual that comes with the dehydrator says that jerky takes between four and 15 hours to dry, depending on the thickness of the meat. That wide range is one big reason I like the jerky gun. It creates uniform portions that have predictable drying times. I can say with almost 100% certainty that my batches will be done in six hours, but it is your responsibility to research and determine what is safe for you.
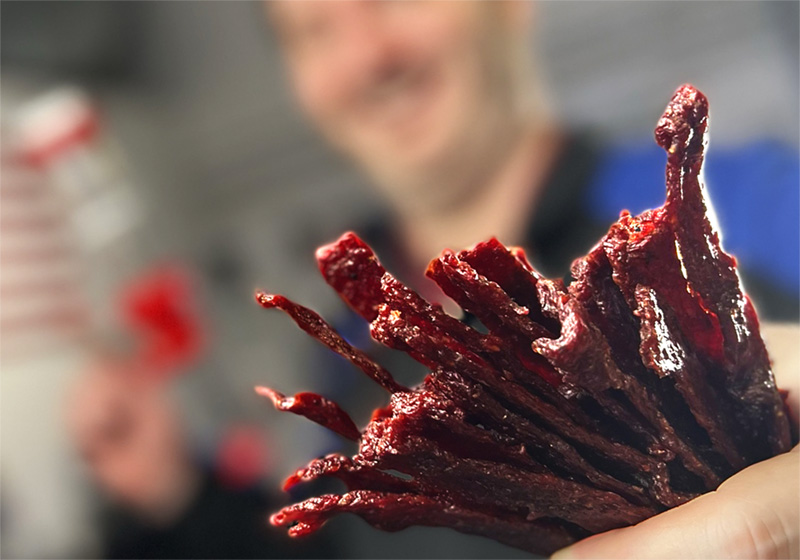
After six hours you should have pieces of jerky that are mostly dry to the touch, a little flexible, and much darker than the raw meat. Pat them down one more time and then DIG IN!
for best results
Every 90 minutes or so, I recommend reversing the order of the trays. Move the top tray to the bottom, and place the next tray on top of that one, etc. This helps everything dehydrate more evenly. As you move each tray, lightly dab the strips of jerky with a paper towel to soak up any excess fat. The fat is what tends to go rancid in jerky. That’s why you always want to start with super lean beef, and why you want to sop up the fat as you go. When you’re done swapping trays, don’t forget to plug the Snackmaster back in.
STORING YOUR JERKY
You might be tempted to eat this all in one sitting. But just in case you’re more disciplined than me, I’ll tell you two ways that I like to store my jerky for maximum freshness. Both of them rely on the power of a FoodSaver vacuum sealer.
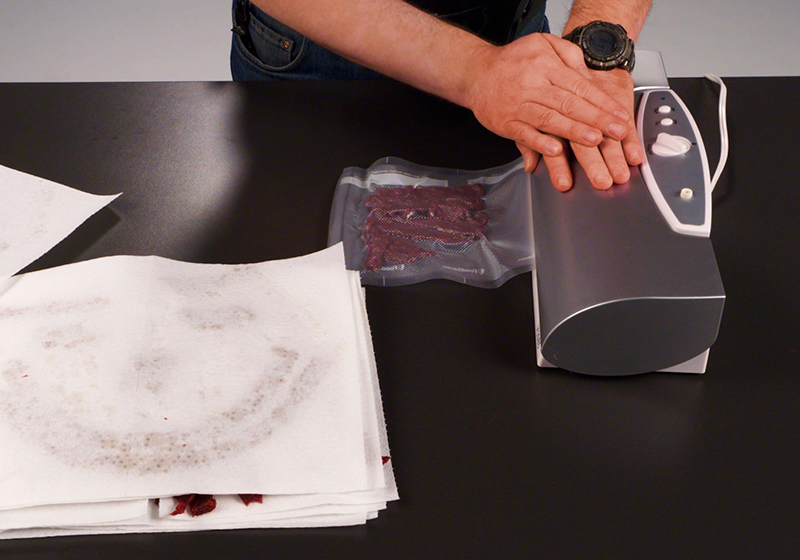
POUCHES: This method is perfect for hiking, camping, or fishing. Or maybe you want a hearty snack when you travel. I make these as light, compact, single servings. You can buy pint, quart, or gallon size bags, or get combo packs. Since I use my FoodSaver a lot, I prefer bulk rolls of the Easy Seal and Peel.
The main drawback I have with pouches is that occasionally the jerky’s sharp edges will puncture the plastic and let air in, so you have to be careful and pay attention while sealing them up.
MASON JARS: You’ll need a FoodSaver accessory kit for this to work. Also, make sure that your jars have lids, if not both lids and the rings. Fill the jar, put the lid on top, pop on the FoodSaver jar attachment, and seal it up. Screw on the ring to secure the lid and you’ve got some emergency rations to tuck away in the pantry.
Both the jars and pouches can be put in the refrigerator or freezer to extend their freshness. The glass jars do require a little extra care but the manufacturer has you covered with a list of tips on their website.
I’m sure that the Vikings would’ve been very happy to find out that somebody finally invented a preserved meat that tasted better than lutefisk. If you have any questions, suggestions—or better yet, jerky ideas—just let us know in the comments below.